Professional cable manufacturer

Professional cable manufacturer
Cable Trays · NEC 392 · 2026-05-29
NEC 392.22 does not set a flat 40% fill. For power and lighting cables in a ladder or ventilated trough tray it points to Table 392.22(A) Column 1 — an absolute fill area running from 1,500 mm² at 50 mm width to 27,000 mm² at 900 mm — while control-or-signal-only trays are capped at 50% (ladder, ventilated) or 40% (solid bottom). Single-conductor cables follow a third test entirely: the sum of their outside diameters must fit the tray width. This guide gives the clause-by-clause method, two worked examples with every figure shown, and the 392.80 derating that follows once the tray is sized.
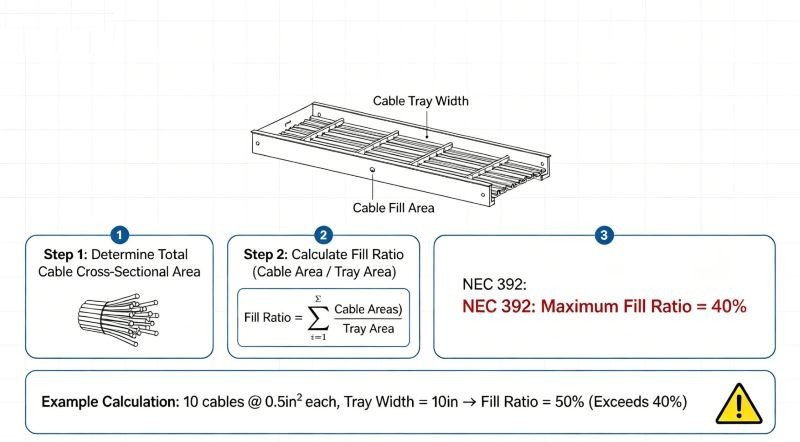
Fail here and the tray either jams during the pull or fails the inspector's fill check at submittal stage. The section is short but it does not work the way most summaries describe it, because it splits into three separate tests by cable type and tray type — and only one of those three tests is a percentage.
Power and lighting cables (multiconductor, ≤2000 V): an absolute area limit from Table 392.22(A), not a percentage. Ladder, ventilated trough and wire mesh take Column 1; solid bottom takes the smaller Column 3.
Control and signal cables on their own: 50% of the interior cross-sectional area in a ladder or ventilated trough tray, 40% in a solid bottom tray — both calculated on the tray's inside depth capped at 150 mm.
Single-conductor cables: no area table at all for 1/0–4/0 AWG — the sum of the cable outside diameters simply has to fit inside the tray width.
Where a ladder or ventilated trough tray carries multiconductor power or lighting cables, or any mixture of power, lighting, control and signal cables, 392.22(A)(1) sends you to one of three sub-rules depending on conductor size:
Solid bottom trays repeat the same three-way split in 392.22(A)(3), with one material difference: the 4/0-and-larger diameter sum is capped at 90% of the tray width rather than 100%, and the area columns are the smaller Column 3 and Column 4.
Notice what is absent. There is no line in 392.22(A)(1) or (A)(3) that says "power cables are limited to 40% of the tray." The limit is a number of square millimetres read off a table against your tray width — 3,000 mm² at 100 mm wide, 6,000 mm² at 200 mm, 9,000 mm² at 300 mm — and it does not change with tray depth.
The two percentages everyone quotes do exist in 392.22, but they belong to a narrower case than most summaries imply. They apply to a tray whose contents are only multiconductor control and/or signal cables:
The 150 mm cap matters on deep trays. Where the usable inside depth exceeds 150 mm, both clauses direct you to compute the allowable interior area using a depth of 150 mm — extra depth buys you nothing for fill purposes when the tray carries only control and signal cable.
Single-conductor cables do not use the multiconductor area table. 392.22(B)(1) splits them by size:
This is the single most common sizing error we see on submittals: a 4/0 single-conductor feeder run checked against a percentage of the tray area, when the governing clause is a diameter sum that will reject or accept the tray long before any area figure does.
An earlier version of this page stated that NEC 392.22 limits power and lighting cables to 40% fill, solid-bottom trays to 35%, and that a mixed power-and-control tray is checked at 40% for the power portion and 50% for the control portion. Checked against the clause text, that is not how 392.22 works:
The worked examples below use the clause figures. Every step is shown so you can re-run it against the clause text you are designing to.
| Tray type | What is in it | Governing clause | Test |
|---|---|---|---|
| Ladder / ventilated trough / wire mesh | Multiconductor power or lighting, or any mix of power, lighting, control, signal | 392.22(A)(1) | Area ≤ Table 392.22(A) Col. 1; mixed → Col. 2; all ≥4/0 AWG → diameter sum ≤ width, single layer |
| Ladder / ventilated trough | Multiconductor control and/or signal only | 392.22(A)(2) | Area ≤ 50% of interior area, depth taken as 150 mm max |
| Solid bottom | Multiconductor power or lighting, or any mix of power, lighting, control, signal | 392.22(A)(3) | Area ≤ Table 392.22(A) Col. 3; mixed → Col. 4; all ≥4/0 AWG → diameter sum ≤ 90% of width |
| Solid bottom | Multiconductor control and/or signal only | 392.22(A)(4) | Area ≤ 40% of interior area, depth taken as 150 mm max |
| Ladder / ventilated trough | Single-conductor, 1/0–4/0 AWG | 392.22(B)(1)(d) | Sum of diameters ≤ tray width; single layer (392.22(D)) |
| Ladder / ventilated trough / wire mesh | Single-conductor, 250–900 kcmil | 392.22(B)(1)(b) | Area ≤ Table 392.22(B)(1) Col. 1 |
| Ladder / ventilated trough / wire mesh | Single-conductor, 1000 kcmil and larger | 392.22(B)(1)(a) | Sum of diameters ≤ tray width; single layer |
| Ventilated / solid channel | Multiconductor, any type | 392.22(A)(5) / (A)(6) | Single cable → Col. 1 of the channel table; more than one → Col. 2 |
Clause numbering per Article 392 as published in the 2020 edition of the NEC (adopted as the 2022 California Electrical Code). The structure of 392.22(A)(1)–(A)(6) and 392.22(B)(1)(a)–(d) is unchanged in the 2023 edition.
Sizing goes wrong at the data-gathering stage far more often than at the arithmetic. Five inputs, in this order:
Put the OD, quantity and conductor size bracket on one line per cable size, then compute the governing quantity — area or diameter sum — once per bracket. If your schedule mixes 4/0 and smaller cables, expect to compute two figures, not one.
Six single-conductor 4/0 AWG THHN copper feeders, to be laid in a ladder tray, single layer. This is 392.22(B)(1)(d) territory — the diameter sum test — and the calculation takes two lines.
| Cable | Class | Qty | Finished OD (mm) | Diameter sum (mm) |
|---|---|---|---|---|
| 4/0 AWG THHN, copper, single core | Single-conductor, 1/0–4/0 AWG bracket | 6 | 17.3 | 103.8 |
OD is a representative figure from the manufacturer's data sheet for finished 4/0 AWG THHN. Substitute the OD from the data sheet for the cable you are actually buying — the test and the clause do not change.
Two consequences worth carrying into the submittal. First, tray depth is irrelevant to this test — a 50 mm deep tray and a 150 mm deep tray pass identically at 150 mm width, because the clause constrains width only. Second, the spare width is not spare fill: 392.22(D) requires these conductors in a single layer, so the 96 mm of headroom at 200 mm width is headroom for future cables laid alongside, not above.
Contrast that with the same ampere rating in a different construction. Take six single-conductor 250 kcmil cables instead, which sit in the 250–900 kcmil bracket and therefore switch to the area table:
One size bracket down the list, and the governing quantity flipped from a diameter sum to an area. Reading the right row of Table 1 is the whole skill here.
Now the case that trips most people: large multiconductor power cables sharing a tray with smaller control cables. One cable class is above the 4/0 AWG line, the rest below it, so 392.22(A)(1)(c) governs and the deduction term Sd appears.
| Cable | Bracket | Qty | OD (mm) | Area each (mm²) | Subtotal (mm²) |
|---|---|---|---|---|---|
| 4/0 AWG multiconductor power cable, copper | 4/0 AWG and larger | 6 | 27.0 | 572.6 | 3,435.4 |
| 12 AWG 4-core shielded control cable | Smaller than 4/0 AWG | 12 | 11.9 | 111.2 | 1,334.4 |
OD values are representative manufacturer data-sheet figures for the constructions named. The 4/0-and-larger cables are not counted in the area column that matters — under (A)(1)(c) they are handled by the deduction term, not by an area sum.
392.22(A)(1)(c) asks one question: is the total area of the smaller cables within Column 2? And Column 2 is defined as Column 1 minus 30 mm times Sd, where Sd is the sum of the diameters of the 4/0-and-larger cables in the same tray.
Two things to take from this. The deduction term is not small: on a 200 mm tray it consumed 4,860 of the 6,000 mm² allowance, or 81% of the table value, purely because six large cables share the tray. And the arithmetic is indifferent to how you feel about the answer — the run that "looks fine" at 200 mm is short by 194 mm² of allowable area, and the fix is one width step, not a redesign.
If the same two cable groups sat in a solid bottom tray instead, you would repeat the calculation against Column 3 and Column 4: Column 3 at 225 mm is 5,100 mm², Column 4 is 5,100 − (25 × 162) = 1,050 mm², and the 1,334.4 mm² of control cable would fail at every width up to 300 mm. Solid bottom trays are materially stricter, and that is the only sense in which a percentage such as 40% describes power trays — loosely, and by coincidence of the numbers.
Using conductor diameter instead of finished cable OD. A 4/0 bare conductor is roughly 13 mm; the finished cable is roughly 17 mm. In area terms that is a 36% difference — enough to move a tray one or two standard widths. Always the data sheet, never the conductor table.
Both tables are published in the NEC with a millimetre column and an inch column side by side. They are separate tabulations rather than conversions of one another — the inch figure for a 100 mm tray is 4.5 in², while the millimetre figure of 3,000 mm² converts to about 4.65 in². Work from the column that matches your drawings and do not convert between them. The tables below reproduce the millimetre columns, which is how SORIVO trays and most export project drawings are specified.
| Inside width (mm / in) | Col. 1 — ladder, ventilated trough, wire mesh | Col. 2 — same trays, mixed sizes | Col. 3 — solid bottom | Col. 4 — solid bottom, mixed sizes |
|---|---|---|---|---|
| 50 / 2 | 1,500 mm² | 1,500 − (30 × Sd) | 1,200 mm² | 1,200 − (25 × Sd) |
| 100 / 4 | 3,000 mm² | 3,000 − (30 × Sd) | 2,300 mm² | 2,300 − (25 × Sd) |
| 150 / 6 | 4,500 mm² | 4,500 − (30 × Sd) | 3,500 mm² | 3,500 − (25 × Sd) |
| 200 / 8 | 6,000 mm² | 6,000 − (30 × Sd) | 4,500 mm² | 4,500 − (25 × Sd) |
| 225 / 9 | 6,800 mm² | 6,800 − (30 × Sd) | 5,100 mm² | 5,100 − (25 × Sd) |
| 300 / 12 | 9,000 mm² | 9,000 − (30 × Sd) | 7,100 mm² | 7,100 − (25 × Sd) |
| 400 / 16 | 12,000 mm² | 12,000 − (30 × Sd) | 9,400 mm² | 9,400 − (25 × Sd) |
| 450 / 18 | 13,500 mm² | 13,500 − (30 × Sd) | 10,600 mm² | 10,600 − (25 × Sd) |
| 500 / 20 | 15,000 mm² | 15,000 − (30 × Sd) | 11,800 mm² | 11,800 − (25 × Sd) |
| 600 / 24 | 18,000 mm² | 18,000 − (30 × Sd) | 14,200 mm² | 14,200 − (25 × Sd) |
| 750 / 30 | 22,500 mm² | 22,500 − (30 × Sd) | 17,700 mm² | 17,700 − (25 × Sd) |
| 900 / 36 | 27,000 mm² | 27,000 − (30 × Sd) | 21,300 mm² | 21,300 − (25 × Sd) |
Sd = the sum, in millimetres, of the diameters of all 4/0 AWG and larger multiconductor cables sharing the tray. Column 1 applies under 392.22(A)(1)(b); Column 2 under (A)(1)(c); Column 3 under (A)(3)(b); Column 4 under (A)(3)(c). The allowable area does not vary with tray depth. Column 1 follows the tray width at roughly 30 mm² per millimetre of width, but read the table rather than the ratio — the published values are the enforceable ones.
| Inside width (mm / in) | Col. 1 — 250–900 kcmil | Col. 2 — mixed with 1000 kcmil and larger |
|---|---|---|
| 50 / 2 | 1,400 mm² | 1,400 − (28 × Sd) |
| 100 / 4 | 2,800 mm² | 2,800 − (28 × Sd) |
| 150 / 6 | 4,200 mm² | 4,200 − (28 × Sd) |
| 200 / 8 | 5,600 mm² | 5,600 − (28 × Sd) |
| 225 / 9 | 6,100 mm² | 6,100 − (28 × Sd) |
| 300 / 12 | 8,400 mm² | 8,400 − (28 × Sd) |
| 400 / 16 | 11,200 mm² | 11,200 − (28 × Sd) |
| 450 / 18 | 12,600 mm² | 12,600 − (28 × Sd) |
| 500 / 20 | 14,000 mm² | 14,000 − (28 × Sd) |
| 600 / 24 | 16,800 mm² | 16,800 − (28 × Sd) |
| 750 / 30 | 21,000 mm² | 21,000 − (28 × Sd) |
| 900 / 36 | 25,200 mm² | 25,200 − (28 × Sd) |
Sd here is the sum, in millimetres, of the diameters of all 1000 kcmil and larger single-conductor cables in the same tray. Single conductors of 1/0–4/0 AWG do not appear in this table at all — they are governed by the diameter sum test in Table 1.
Fill is the geometric check. The electrical check is 392.80, and it is where a passing fill calculation can still produce a cable that runs hot. The factors depend on whether the cables are multiconductor or single-conductor, and on whether the tray is covered.
| Cable type | Tray condition | Maximum ampacity | Clause |
|---|---|---|---|
| Multiconductor, ≤2000 V | Ladder, ventilated trough, uncovered | Table 310.16 / 310.18 values | 392.80(A)(1) |
| Multiconductor, ≤2000 V | Continuously covered >1.8 m with solid unventilated covers | 95% of Table 310.16 / 310.18 | 392.80(A)(1)(b) |
| Single-conductor, 1/0 AWG–500 kcmil | Uncovered | 65% of Table 310.17 / 310.19 | 392.80(A)(2)(b) |
| Single-conductor, 1/0 AWG–500 kcmil | Continuously covered >1.8 m | 60% of Table 310.17 / 310.19 | 392.80(A)(2)(b) |
| Single-conductor, 600 kcmil and larger | Uncovered | 75% of Table 310.17 / 310.19 | 392.80(A)(2)(a) |
| Single-conductor, 600 kcmil and larger | Continuously covered >1.8 m | 70% of Table 310.17 / 310.19 | 392.80(A)(2)(a) |
| Single-conductor, 1/0 AWG and larger | Single layer, spacing ≥1 cable diameter | Table 310.17 / 310.19 values | 392.80(A)(2)(c) |
The four derating percentages are quoted from 392.80(A)(1)(b) and (A)(2)(a)(b) as published. Note that (A)(2)(a)–(b) apply to single-conductor installations following 392.22(B) — which is exactly the case in worked example 1, where six 4/0 THHN feeders fall in the 1/0–500 kcmil bracket and are therefore held to 65% of the free-air table in an uncovered tray unless they are laid single-layer with at least one cable diameter of spacing between conductors.
An earlier version of this page gave the covered-tray derating as 95% for 4–6 cables, 90% for 7–24 and 85% for 25–42. Those three bands do not appear in 392.80. The clause gives a single 95% factor for covered multiconductor installations, and a set of size-based factors for single-conductor installations. If you are working from the earlier figures, re-check the ampacity column of the design — the difference between 90% and 65% on a 4/0 feeder is not a rounding matter.
Ambient temperature and grouping corrections still apply on top, and the tray is not special in that respect — the same correction factors that apply in conduit and direct burial apply here. We work through the stacking of temperature, grouping and altitude corrections in the ampacity derating factors guide, and the installation-method comparison for tray versus conduit versus burial is in cable ampacity by installation method.
Article 392 tells you how full the tray may be. It says nothing about whether the tray can carry the load. That comes from the product standard, and the two families in common use derive their numbers differently — which is why a load figure quoted without its span is not a comparison at all.
| Aspect | NEC 392 | NEMA VE 1 | IEC 61537 |
|---|---|---|---|
| Scope | Installation: permitted uses, fill limits, derating | Product: load classes, testing, materials | Product + tests, internationally adopted |
| Fill limit | Areas from Table 392.22(A) and (B); 50% / 40% for control-only trays | Not specified | Not a percentage — cables per layer by OD and tray width, with spacing factors |
| Basis of the load figure | Not addressed | Load-based: test to destruction, published load carries a 1.5 safety factor, plus a 200 lb (90.7 kg) concentrated load without collapse | Deflection-based: the declaration pairs a safe working load with a support span and a deflection criterion |
| Load class notation | — | Span in feet plus letter: A = 50, B = 75, C = 100 lb/ft | No letter class — the load, span and deflection are stated together |
| Natural market | USA | North America | Europe, Middle East, Africa, Asia |
NEMA VE 1 figures from the type-test description published in manufacturer engineering guides; IEC 61537 structure per the 2023 edition's published scope and change list. The two are not convertible: a NEMA class and an IEC declaration describe different tests of the same physical tray.
An earlier version of this page gave the load-test row as "NEMA VE 1: 1.5× SWL, deflection ≤ span/150" and "IEC 61537: 1.5× SWL, deflection ≤ span/200". The 1.5 safety factor is correct for NEMA VE 1, but NEMA VE 1 verifies its published load by testing to destruction and does not impose a span-fraction deflection acceptance criterion in the way that phrasing suggests. Nor does 1.5 × SWL with a span/200 deflection figure describe the IEC method — IEC declarations are deflection-based, and the criterion travels with the declaration rather than being inherited from the standard. Both rows have been replaced with what the two frameworks actually define.
IEC 61537:2023 (edition 3.0) was published on 24 January 2023 and cancels the 2006 edition. It is a technical revision, not a reprint: figures were repositioned and renumbered, the corrosion classification was revised, the SWL test types and procedures were revised, tests were added for vertical mounting and running orientations and for support devices, and new annexes were added including guidance on using the tray as a protective earth conductor. A test report to the 2006 edition is not automatically a report to the 2023 edition — confirm which edition your project specification invokes and ask suppliers for load data aligned to it. IEC 61537:2023 publication page.
Fill and load get the attention; coating and traceability decide whether the installation is still sound in year fifteen. Steel gauge, galvanizing quality and published load data vary widely between suppliers, and the differences are visible in the documents rather than in the catalogue photograph.
| What to check | Weak answer | Answer that survives a submittal review |
|---|---|---|
| Steel thickness | Nominal gauge only, no per-width figure | Stated thickness per width, e.g. 2.0 mm at 300 mm width, with the load class it supports |
| Galvanizing | "Hot dip galvanized" with no standard or grade | Coating per ASTM A123 / ISO 1461 with the minimum thickness grade stated for each steel thickness on the shop drawing |
| Load data | A bare SWL number with no span | Load table indexed by support span, with the test factor and the deflection criterion stated |
| Fittings | Field modification expected at bends and tees | Standardised splice, bend and tee family, so the installed system matches the tested one |
| Traceability | No marking on the section | Batch-traceable marking, mill certificates and coating thickness reports on request |
A usable load table carries three numbers, not one: the safe working load, the support span it is valid at, and the deflection criterion at that load. A figure quoted without the span cannot be compared with your route, and a figure quoted without a deflection criterion cannot be compared with a project that specifies one. When you hold all three constant between two suppliers, the comparison becomes arithmetic instead of impression.
Two checks catch most submittal problems. Confirm the span in the table matches your actual support spacing — load capacity falls quickly as span increases, so a table based on a 1.5 m span tells you nothing about a 3 m run. Then ask for the underlying test report rather than the summary figure; a supplier with certified tables and batch traceability produces both within a day.
Both ASTM A123 and ISO 1461 set minimum coating thickness by steel thickness rather than as a single site-wide figure. ASTM A123 Table 1 grades for structural shapes step up through 45, 65, 75 and 100 µm as the steel gets thicker; ISO 1461 works in minimum mean thickness bands, in the region of 45–55 µm for steel under 3 mm and 70–85 µm at and above 3 mm. That is why a specification written as "galvanized to 65 µm" is incomplete: on a thin rail it may be generous, and on a 3 mm side rail it may be below the grade the standard assigns.
Hot-dip galvanizing after fabrication is what makes the coating work at the edges. Every sheared edge and punched hole on a pre-galvanized (coil-coated) tray is bare steel — typically around 18–20 µm of zinc per side on the coil, with nothing on the cut face — which is why thin pre-galvanized trays rust at the cut edges and splice plates first, not in the middle of the rail. Match the finish to the environment: dry conditioned interiors tolerate the thinner coatings, while outdoor, coastal, wastewater and chemical areas justify stainless 304/316 or aluminium despite the premium. When a specification simply says galvanized to ASTM A123 or ISO 1461, ask for the coating thickness grade per steel gauge on the shop drawing. It turns site acceptance into a measurement rather than an argument.
A solid cover traps heat and triggers 392.80(A)(1)(b): covered for more than 1.8 m, multiconductor cables are held to 95% of the ampacity table, and single-conductor cables generally to a lower figure still. A tray that passes the fill check at 40% of the available area can still fail the ampacity check once the cover is on. Size the cables, not just the tray, with the cover in the calculation.
Ladder trays physically accept multiple layers, and Article 392 constrains the ones that matter: cables 4/0 AWG and larger — and in mixed trays, all of them — must sit in a single layer with nothing laid on top, and 1/0–4/0 AWG single conductors must be single-layer as well. Each extra layer of the cables that are permitted to stack reduces airflow and pushes you toward the derating figures above.
Firestop pillows, wrap strips and putty pads occupy tray volume at the crossing. Where the tray passes through a fire-rated wall or floor, size the penetration so the listed firestop system can be installed around the cables without compressing them against the rungs, and carry the extra width through the rest of the run rather than narrowing it immediately either side of the wall.
This page quotes clause-level fill and derating requirements from Article 392 as published, and gives two worked examples with the arithmetic visible so a reviewer can re-run them. It does not interpret your local amendment cycle, and it does not replace the engineer of record's check against the edition your jurisdiction has adopted — adoption of a new NEC edition varies by state and by project, and the clause structure is what has to be confirmed, not the article number.
On the tray side, we publish what we build and test: tray types, materials, finishes and load data, with certificates where a project requires them. We do not publish a fill calculator that silently mixes the three tests in Table 1, because the most common sizing failure we see is not arithmetic — it is applying the control-cable percentage to a power-cable tray.
Short version. Identify the cable class per cable, not per tray. Read the governing clause off Table 1. Compute the area or the diameter sum with finished outside diameters. Then apply 392.80 before you accept the ampacity column. Four steps, and the tray stops being the reason the inspection fails.
Send us the cable types, conductor sizes, quantities and finished outside diameters, plus your support span. We will return the minimum tray width and depth against the clause you are designing to, with the cable side of the schedule quoted at the same time.

There is no single ratio for power cables. Multiconductor power and lighting cables are limited by the absolute areas in Table 392.22(A) Column 1 — 3,000 mm² at 100 mm tray width, 6,000 mm² at 200 mm — and mixed-size trays by Column 2. The two percentages in 392.22 apply to control and signal cables only: 50% in a ladder or ventilated trough tray, 40% in a solid bottom tray.
Neither figure describes a power cable tray. The 50% limit is 392.22(A)(2), for a ladder or ventilated trough tray carrying multiconductor control and/or signal cables only. The 40% limit is 392.22(A)(4), the same cable class in a solid bottom tray. Both are calculated on the tray's inside depth capped at 150 mm. A power tray is checked against a fill area read from the table, not against a percentage.
Identify the cable class for each cable first, because the test changes. Multiconductor cables under 4/0 AWG use the sum of their cross-sectional areas against Table 392.22(A) Column 1. Single conductors of 1/0–4/0 AWG use the sum of their diameters against the tray width. Then step up through standard widths until the governing figure passes, and check ampacity under 392.80 separately.
Yes. NEC 392.20(A) permits power, control and signal cables in one tray subject to the fill rules, and above 600 V a barrier or maintained separation is required. In a mixed tray the large multiconductor cables take the deduction term in Column 2, the smaller cables must fit within what is left, and the large cables go in a single layer with nothing laid on top of them.
For multiconductor cables in a tray continuously covered for more than 1.8 m with solid unventilated covers, 392.80(A)(1)(b) allows not more than 95% of the ampacity table. Single-conductor cables of 1/0–500 kcmil are held to 65% uncovered and 60% covered; 600 kcmil and larger to 75% uncovered and 70% covered. Ambient and grouping corrections apply on top of these.
No. IEC 61537 does not set a percentage fill limit at all — it works from the number of cables per layer based on cable outer diameter and tray width, with spacing factors. The NEC fill percentages are nevertheless widely written into international project specifications, so confirm which framework the specification invokes rather than assuming either one.