Professional cable manufacturer

Professional cable manufacturer
📅 Published: 2026-06-12 | 📁 Category: Cable Installation Guide | ⏱ 12 min read
The most carefully selected cable will perform poorly if it is damaged during installation. Excessive pulling tension, inadequate bend radius, or lack of proper support rollers can cause mechanical damage to the conductor, insulation, or sheath that may not be visible at the time but leads to premature failure years later.
Industry experience consistently shows that a significant proportion of cable installation failures can be traced back to improper installation practices — predominantly over-tensioning, incorrect bending, and lack of side-wall pressure management. These are all problems that correct equipment selection and a pre-installation checklist can prevent.
This guide provides a practical reference for site supervisors and installation crews: the essential equipment list, maximum pulling tension tables for common SWA and XLPE cables, side-wall pressure limits, lubrication guidelines, and a 12-point pre-installation checklist that covers every stage from transport to termination.
The following equipment categories cover the majority of low and medium voltage armoured cable installations. The specific sizes and capacities required depend on the cable type, conductor size, and route complexity.
Straight rollers for trench runs, radius rollers for bends, corner rollers for 90° turns. Essential for maintaining bend radius and reducing friction. Spacing: every 2–3 m on straight runs, closer on bends.
Stocking grips (Kellems grips) for pulling on sheath, pulling eyes bolted or compressed onto conductor, swivels to prevent cable twisting. Match grip size to cable OD exactly.
Dynamometer or load cell inline with pulling rope. Real-time tension readout with maximum-hold feature. Set alarm threshold at 80% of rated cable pull tension.
Water-based polymer lubricant for XLPE/PVC sheaths. Apply continuously at feed-in point. Typical COF: 0.15–0.25 for lubricated pulls. Never use petroleum-based products on XLPE.
Synthetic rope (polyester or polypropylene) with rated breaking strength ≥ 3× expected max tension. Winch with variable speed control and emergency stop. Avoid steel wire rope — it damages cable sheaths if contact occurs.
Ring cutter for outer sheath, side-stripper for insulation, hacksaw for armour wires, crimping tool with calibrated dies, heat gun for shrink-back. All blades must be sharp — blunt tools cause sheath tearing.
500V or 1000V megohmmeter (depending on cable rating). Pre- and post-installation IR test. Minimum acceptable reading: typically 100 MΩ·km for LV XLPE cables at 20°C.
Armour clamps, weatherproof glands (BS EN 50262, formerly BS 6121), earth tag washers, compression lugs. Pre-assemble gland onto cable before positioning into enclosure for tight spaces.
The maximum pulling force that can be applied to a cable depends on whether the pull is applied to the copper conductor or the steel wire armour. Pulling on the armour allows significantly higher tension but requires the correct pulling attachment.
| Conductor Size (mm²) | Max Pull via Conductor (kN) — 50 N/mm² | Max Pull via Conductor (kN) — 70 N/mm² |
|---|---|---|
| 2.5 | 0.13 | 0.18 |
| 4 | 0.20 | 0.28 |
| 6 | 0.30 | 0.42 |
| 10 | 0.50 | 0.70 |
| 16 | 0.80 | 1.12 |
| 25 | 1.25 | 1.75 |
| 35 | 1.75 | 2.45 |
| 50 | 2.50 | 3.50 |
| 70 | 3.50 | 4.90 |
| 95 | 4.75 | 6.65 |
| 120 | 6.00 | 8.40 |
| 150 | 7.50 | 10.50 |
| 185 | 9.25 | 12.95 |
| 240 | 12.00 | 16.80 |
Copper conductor values based on total cross-section (single-core) or total conductor cross-section of all cores (multi-core). The 50 N/mm² limit is the conservative standard; 70 N/mm² applies where the pulling eye is factory-fitted and certified. Per General Cable NZ / AEI Cables / Prysmian industry guidelines.
| Cable Type | Max Pull via Armour (kN) | Notes |
|---|---|---|
| 2-core 6 mm² SWA | 4 | Per Nexans / Prysmian typical data |
| 2-core 16 mm² SWA | 6 | Pulling eye on galvanised steel wires |
| 3-core 16 mm² SWA | 9 | Larger armour wire cross-section |
| 3-core 35 mm² SWA | 12 | Verify with manufacturer datasheet |
| 4-core 25 mm² SWA | 14 | Use swivel to prevent armour unwinding |
| 4-core 95 mm² SWA | 20 | Absolute practical max for most winches |
At every bend in the cable route, the cable experiences a side wall pressure (SWP) calculated as:
Correct lubrication reduces pulling tension proportionally on straight runs and exponentially on bends. The coefficient of friction (COF) for an unlubricated XLPE/PVC sheath in conduit can exceed 0.5; with proper lubricant, this drops to 0.15–0.25.
| Lubricant Type | Typical COF | Best For | Key Limitation |
|---|---|---|---|
| Water-based polymer | 0.15–0.25 | XLPE, PVC, LSZH sheaths | Dries out in hot weather; reapply on long pulls |
| Wax-based synthetic | 0.11–0.20 | High-temperature environments | More expensive; harder clean-up |
| Gel lubricant | 0.18–0.30 | Vertical risers, overhead pulls | Higher COF than polymer; good cling |
| Silicone oil supplement | Additional 10% reduction | Additive to polymer lubes | Can stain surfaces; use sparingly |
Application rule: Apply lubricant continuously at the cable feed-in point — never apply only at the pulling end. For duct runs longer than 50 m, use a lubricant pump to ensure coverage along the entire length. A typical pull uses 1 litre of lubricant concentrate per 100 m of 4-core 16 mm² cable.
| Factor | Standard Market Cable | SORIVO Armoured Cable |
|---|---|---|
| Conductor | Plain copper (variable strand count) | Class 2 stranded copper, BS EN 60228 certified |
| Insulation | PVC or generic XLPE | XLPE Type GP8 to BS 7655 — 90°C, 250°C SC |
| Armour construction | Variable wire gauge and count | Consistent galvanised steel wire, BS standard |
| Max pull tension documentation | Often not published | Published per datasheet, batch-traceable |
| Traceability | Limited or no metre marking | Metre-marked, batch-traceable, BASEC-certified |
| Warranty | 5–15 years | 25 years |
Equipment and preparation time cost money upfront. But the cost of rectifying a damaged cable after installation is far higher — and the cost of an in-service failure higher still.
| Issue | Detection Point | Rectification Cost (per incident) |
|---|---|---|
| Sheath gouging from missing rollers | Post-installation IR test | £500–2,000 (local repair or short section replacement) |
| Conductor necking from over-tension | Pre-termination inspection | £2,000–8,000 (full cable section replacement) |
| Insulation damage from exceeded SWP | After energisation (HV flashover) | £10,000–50,000 (excavation, replacement, downtime) |
| Armour damage from incorrect pulling grip | During pull (audible creaking) | £5,000–15,000 (abort pull, remove and replace) |
| Premature failure from undetected damage | In-service (2–5 years after install) | £20,000–100,000+ (fault location, excavation, replacement, downtime) |
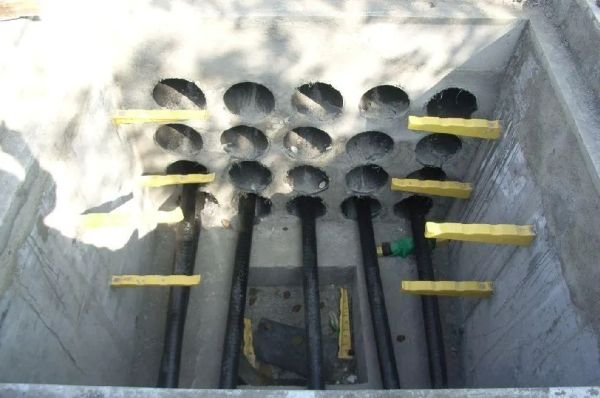
Before any cable is pulled, complete each item on this checklist. This applies to all low and medium voltage armoured cable installations in trenches, ducts, trays, and risers.
A successful cable installation depends on three things: the right equipment, the correct pulling parameters, and a thorough pre-installation check. The principles are straightforward:
At SORIVO, all armoured cables are supplied with published pulling tension and bend radius data. Our technical team can provide route-specific pulling calculations and recommend the appropriate equipment for your installation.
Further reading:
We provide full technical datasheets with maximum pulling tensions, minimum bend radii, and recommended installation parameters for all SORIVO armoured cables. Contact our team for project-specific pulling calculations.
Request Technical Datasheets📧 sale@sorivocable.com | 📞 +86 192 8290 5529
For cables pulled in open trench with rollers, a pulling speed of 10–15 m/min is typical. For cables pulled through ducts, reduce speed to 5–10 m/min to allow the lubricant to maintain a continuous film and prevent tension spikes at bends. The most important rule: pull at a constant speed — starting and stopping creates tension surges that can exceed the cable's rated limit. Never exceed 20 m/min under any circumstances.
Yes, for small SWA cables (up to about 10 mm² 3-core), a wire mesh stocking (Kellems grip) over the outer sheath is acceptable for short pulls under low tension. For larger cables, the stocking can slip or the armour wires can cut through the mesh. The rule: for cables where the calculated pull tension exceeds 2 kN, use a compression-type pulling eye on the armour wires or a bolted pulling eye on the conductor. For medium voltage cables, always use a factory-fitted pulling eye.
The cumulative tension at any point is the sum of straight-run tension (weight × COF × length) plus the tension multiplier at each bend. At a 90° bend, the tension multiplies by approximately e^(μθ) where θ = 1.57 radians. For a typical COF of 0.2, this gives a multiplier of about 1.37× per 90° bend. For three 90° bends in series, the end tension is roughly T₀ × 1.37³ = 2.57 × T₀. This is why bends dominate the pulling calculation. Most installation standards recommend no more than three 90° bends in a single pull section without an intermediate pull point.
For LV XLPE cables (0.6/1 kV), the minimum acceptable insulation resistance is typically 100 MΩ·km at 20°C when measured with a 500V or 1000V megohmmeter. The more important test is the comparison between pre-pull and post-pull readings. A drop of more than 30% indicates mechanical damage to the insulation — the cable should be investigated before energisation. Temperature correction is important: IR values approximately halve for every 20°C temperature rise. Always record the cable temperature at the time of testing.
Pulling a new cable into a duct that already contains cables is not recommended unless the duct is specifically designed for multiple cables (e.g., sub-ducts installed at construction). The existing cables may have moved or twisted, creating friction points and potential damage to the new cable's sheath. Additionally, the existing cables' ampacity will be affected by the new cable's presence (grouping derating). If multi-cable pulling is unavoidable, use a separate sub-duct for each cable, apply generous lubricant, and use a mandrel to confirm the duct is clear before pulling. For existing ducts, always CCTV inspect before pulling.