Professional cable manufacturer

Professional cable manufacturer
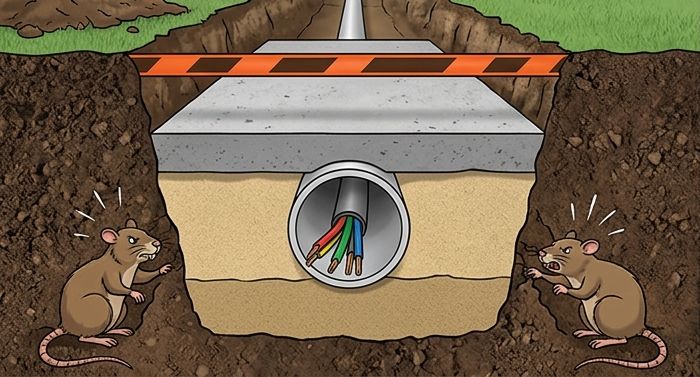
I've spent the better part of 15 years in cable manufacturing, and here's something I've learned the hard way: rodents don't care about your project deadline. They don't care about your budget either. A single rat can chew through a PVC-sheathed cable in minutes, and the result is a fault that can take days to locate and thousands to fix.
The thing is, rodent damage to buried cables is way more common than most engineers realise. Industry data from UK distribution network operators consistently shows that animal-related faults are a significant contributor to underground cable failures — in some urban networks accounting for up to 5–8% of all buried cable faults. In rural and agricultural zones that percentage tends to be even higher. And it's not just rats — squirrels, gophers, groundhogs, and termites all take their toll.
So let's talk about what actually works — and what's just a waste of money — when it comes to protecting direct buried cables from animal damage.
First, let's clear up a common myth: rodents are not after the copper inside. I've seen project managers swear they need thicker copper because "the rats are eating it." That's not how it works.
Rodents gnaw on cables for a few very different reasons:
Different animals cause different types of damage, and knowing your local threat profile makes a big difference in choosing the right protection. Here's what I typically see across projects:
| Animal | Typical Damage Pattern | High-Risk Regions | Burial Depth Risk |
|---|---|---|---|
| Rats & Mice | Clean, small-diameter gnaw marks; often at sheath joints or weak points; can penetrate up to 3 mm PVC | Urban, agricultural, landfill, port areas worldwide | Down to 0.5–1.0 m |
| Squirrels | Coarse, irregular damage; more common on above-ground transitions but can dig to shallow depth | Woodland edges, suburban, parks | Down to 0.3 m |
| Gophers & Moles | Large sections of sheath stripped; tunnel systems expose cables; dirt contamination at damage points | Farmland, grassland, golf courses, open fields | Down to 0.5–1.5 m |
| Termites | Not gnawing but consumption — termites are attracted to organic plasticisers and processing aids in certain sheathing compounds; can hollow out a cable without visible surface damage | Tropical, subtropical (SE Asia, Africa, South America, southern US) | Down to 1.0 m typically; up to 2.0 m in rare cases for mound-building species |
So. If termites are in your region, you're dealing with a fundamentally different problem than simple rodent gnawing. They'll eat through some sheathing compounds like it's lunch. The good news? There are sheath materials they can't digest.
I've organised these roughly from most common / most reliable to most specialised. Every project is different, so don't treat this as a ranked list — treat it as a menu.
If you're asking for one single answer, here it is: SWA armoured cable is the most field-proven rodent deterrent for direct burial. A layer of galvanised steel wires wrapped helically around the cable core provides a physical barrier that rats and mice simply cannot chew through. They'll try — you'll see surface scratches on the armour — but their teeth will wear down before the steel does.
SWA cables to BS 5467 (PVC sheath) or BS 6724 (LSZH sheath) are the default recommendation for direct burial in any region where rodent activity is a known risk. The steel wires also handle impact, soil pressure, and tensile loads, so you're getting multi-layer protection from one solution.
That said, SWA isn't perfect against everything. Termites can still attack the organic components of the sheath behind the armour if they find a path through the cable ends or at joints. And in highly corrosive soil, the galvanised coating can degrade over 20+ years. For most projects though, this is the right starting point.
➡️ See how SWA compares to unarmoured cables — it covers the construction differences in detail.
STA uses two steel tapes applied helically rather than round wires. It offers good compressive strength and a continuous steel barrier that rodents can't penetrate. It's lighter than SWA and more flexible in small cable sizes, which makes it a decent option for shallow burial in moderate-risk areas.
I personally prefer SWA for most direct burial applications because the wire construction handles tensile loads better during installation. But STA works well in conduit or trough systems where the cable won't be under tension. Our SWA vs AWA vs STA comparison breaks down the differences more thoroughly.
This one's clever. Some cable manufacturers add capsaicin-based or bittering agents into the outer sheath compound. The idea is simple: the rodent starts gnawing, gets an unpleasant taste or mild irritation, and moves on.
Does it work? It depends. Field observations suggest capsaicin-loaded sheaths can reduce gnawing incidents significantly in the first few years, though effectiveness varies by soil conditions, climate, and rodent species. The additives can leach out over time in wet soil — so you're essentially buying a few years of extra deterrent rather than a permanent barrier.
Anti-rodent sheaths work best as a second line of defence behind SWA or STA. On their own in a high-rodent area? I wouldn't risk it. But combined with armour, they add useful redundancy.
Running cable inside a rigid conduit is the only method that's truly 100% rodent-proof in the literal sense. If the animal can't touch the cable, it can't damage it. Simple.
Steel conduit is obviously tougher against gnawing, but heavy-duty PVC conduit (to BS EN 61386-21 or equivalent heavy-duty rating) also holds up well — I've seen PVC conduit survive decades in ground with active rodent populations. The key is sealed joints and end caps. A gap at a coupler is an invitation.
The downside? Cost and labour. Conduit adds materials, excavation width, and installation time. And if you're running multiple circuits, you need multiple conduits or a larger diameter to avoid derating issues. That said, one advantage of conduit is replaceability — if a cable fails inside a conduit, you pull it out and pull a new one in. No re-excavation. Our direct burial cable selection guide compares direct-buried vs conduit TCO numbers if you want the full cost picture.
For sections where the cable is at particular risk — shallow crossings near tree roots, pipe inlets, or agricultural vehicle crossings — concrete encasement is overkill but very effective. A cable laid in a concrete trough with a removable cover gives you rodent protection plus inspectability.
I don't recommend full-run concrete encasement unless you're dealing with extreme termite pressure or very shallow burial under roadways. It's expensive and makes future upgrades painful. But for short high-risk sections — say 5–20 metres — it's hard to beat.
Here's a reality check: burial depth alone won't stop rodents. Rats can burrow down to 1 metre in loose soil. Gophers have been found at 1.5 metres. The standard 600 mm burial depth for LV cables is not a rodent deterrent — it's a mechanical protection depth for surface loading.
That said, combining depth with mechanical barriers does help. I've specified these combinations with good results:
None of these are a substitute for armour, but they add a layer of deterrence that costs very little at the installation stage.
Sometimes — especially in remote sites or extreme termite zones — you have to accept that damage will happen eventually. In those situations, the smartest protection is redundancy.
Running two parallel circuits, each sized to carry the full load alone, means a single rodent strike doesn't cause downtime. One circuit faults, the other takes over, and you schedule the repair at your convenience. It's not a prevention method — it's a resilience method. And for critical infrastructure like hospital backup feeders or water treatment plants, it's often code-required anyway.
Here's a quick-reference table I use when helping clients spec out a project. Match your rodent risk level to the recommended approach:
| Rodent Risk Level | Typical Environment | Recommended Protection | Relative Cost |
|---|---|---|---|
| Low | Urban sidewalk, paved area, low green space | Standard SWA armoured cable (BS 5467) at minimum burial depth | $ (baseline) |
| Moderate | Parkland, suburban verge, light agricultural | SWA + anti-rodent sheath compound + sand bedding with warning tape | $$ |
| High | Farmland, landfill, port, known rodent infestation areas | SWA + rigid PVC conduit + stone backfill barrier above cable | $$$ |
| Extreme / Termite | Tropical, SE Asia, Africa, southern US with known termite activity | Steel conduit or concrete trough + SWA cable with termite-resistant sheath (HDPE/MDPE preferred over PVC) | $$$$ |
Before you backfill that trench, run through this checklist. I've added items based on mistakes I've seen on real projects:
For a full walkthrough of cable installation best practices — including trench preparation, snaking, and backfill specifications — check our complete guide to cable laying methods.
The classic symptom is an intermittent earth fault that gets worse in wet weather. Rodent gnawing exposes the armour or conductor, and moisture ingress creates a tracking path to ground. On unarmoured cables, you might see visible trench subsidence where rodents have tunneled along the cable route. On SWA cables, look for partial discharge activity at the gnaw site long before a full fault develops — this is one case where partial discharge testing on LV cables actually pays off.
Let's be honest — nothing is 100% rodent-proof in the real world. But SWA comes close enough for practical purposes. The galvanised steel wires are too hard for rodent teeth to penetrate. What I have seen, however, is damage at cable ends and joints where the armour stops and the inner cores are exposed. The armour itself is safe — the terminations are where you need to stay vigilant. Use sealed, rodent-resistant glands and inspect terminations annually.
You can, but I'd keep expectations realistic. Capsaicin-impregnated sheaths (Method 3 above) are the most practical option because the repellent is built into the cable. Adding granular or spray repellents to the backfill tends to wash away within 6–12 months in most soil types. I've seen projects try mothballs, ammonia-soaked rags, and ultrasonic devices in joint pits — none produced measurable results beyond a few weeks. Mechanical barriers are the only reliable long-term solution. Think of chemical repellents as a temporary deterrent, not a permanent fix.
This is an important distinction. Rodents physically gnaw through materials. Termites are attracted to organic plasticisers and processing aids in certain sheathing compounds — they can consume the sheath material without necessarily damaging the conductor. In tropical regions, HDPE or MDPE sheaths are significantly more termite-resistant than PVC because they lack the organic plasticisers termites target. Also, steel armour helps against rodents but isn't a termite barrier — termites can bypass it through cable ends. If you're working in a termite-prone area, specify HDPE-sheathed armoured cable and encase all terminations in sealed, resin-filled joints.
Up to a point, yes. Time-domain reflectometry (TDR) can locate impedance changes along a cable route, which often correspond to physical damage including rodent gnawing. For LV cables, sheath integrity testing (DC hi-pot test at approximately 5 kV per BS EN 50396) will identify insulation breaches. For MV cables, higher test voltages apply — always follow the manufacturer's recommended test voltage to avoid over-stressing the insulation. Neither method tells you the damage was caused by rodents specifically — just that there's damage at a specific location. The only way to confirm rodent involvement is to excavate at the TDR-indicated fault location and look for gnaw marks. That said, if you're seeing recurring earth faults in an area with known rodent activity, it's a pretty safe bet.
Here's the bottom line: rodent damage to buried cables is one of those problems that's easy and cheap to prevent at installation, and expensive and painful to fix later. The cost difference between a standard PVC-sheathed unarmoured cable and a SWA armoured cable is typically 15–25% on the cable itself. The cost of excavating, locating, and repairing a rodent-damaged cable is easily 3–4 times the original installation cost.
The choice seems obvious when you put it that way, doesn't it?
If you're planning a direct burial project and want to get the cable specification right the first time — including rodent protection — I'd be happy to help. Our technical team works with engineers worldwide to specify the right cable construction for the site conditions they're dealing with.
Reviewed by
Wang Lei — Senior Cable Application Engineer, Sorivo
15+ years in industrial and renewable energy cable specification. Member of IEC TC 20 (Power Cables). Previously contributed to cable selection for 500MW+ solar PV and BESS projects across Asia, Europe, and the Middle East.
We supply BS 5467 and BS 6724 SWA cables with full BASEC certification, metre-marked traceability, and optional anti-rodent sheath compounds. Get a free cable specification review for your site conditions.
Request a Cable Specification Proposal